
Table of Contents
- Why No-Drill Blackout Blinds Are a Renter's Best Friend
- Bead-Fit vs Grip-Fit vs Tension-Fit: Which System Works for Your Windows?
- Measuring for Made to Measure Blackout Blinds
- Step-by-Step: How to Install Blackout Blinds Without Drilling
- How to Remove No-Drill Blinds Without Damage
- Which Window Types Work With No-Drill Blackout Blinds?
- Common Mistakes to Avoid
- Frequently Asked Questions
Last Updated: September 24, 2026
Why No-Drill Blackout Blinds Are a Renter's Best Friend
Renting shouldn't mean living with thin curtains that let in every streetlight. Yet many tenants avoid proper window coverings because they can't drill into walls or window frames. That's where blackout blinds without drilling come in. This guide from Just Blinds explains exactly how to fit them, measure them, and remove them cleanly when you move out.
- No damage to frames or walls
- Nothing to patch or repaint at move-out
- Fits most standard rental windows
- Removable and reusable in your next home
Bead-Fit vs Grip-Fit vs Tension-Fit: Which System Works for Your Windows?
The best no-drill system depends entirely on your window frame. Bead-fit suits windows with a removable beading strip. Grip-fit clamps onto the frame edge. Tension-fit presses against the recess. Check your window before you buy.
Bead-Fit Blinds
Bead-fit blinds slot into the gap where the glazing bead meets the frame. If your window has a removable plastic bead around the glass, this is often the cleanest option. It needs no tools and holds securely once clicked into place.
Grip-Fit Blinds
Grip-fit uses a clamp that grips the top and sides of the frame. It works well on flat frames without a bead. The friction fitting stays put but lifts off without marking the surface.
Tension Fit Blackout Blinds
Tension fit blackout blinds press against the inside of the recess using spring-loaded ends. No fixings touch the frame at all. This makes them the top choice for uPVC windows and rentals where any marking is a risk.
| System | Best Window Type | Tools Needed | Removal |
|---|---|---|---|
| Bead-fit | Windows with removable beading | None | Lift out |
| Grip-fit | Flat frames, no bead | None | Unclip |
| Tension-fit | Recessed windows, uPVC | None | Compress and lift |
Measuring for Made to Measure Blackout Blinds
Accuracy decides whether your blind blocks light or leaks it. Measure the recess width in three places, top, middle and bottom, then use the smallest figure. Do the same for the drop. Made-to-measure blinds fit the gap you actually have, not the gap you assume.
- Width: measure top, middle, bottom, use the smallest
- Drop: measure left, centre, right, use the smallest
- Recess fit: measure inside the frame
- Outside fit: add overlap on all sides
Step-by-Step: How to Install Blackout Blinds Without Drilling
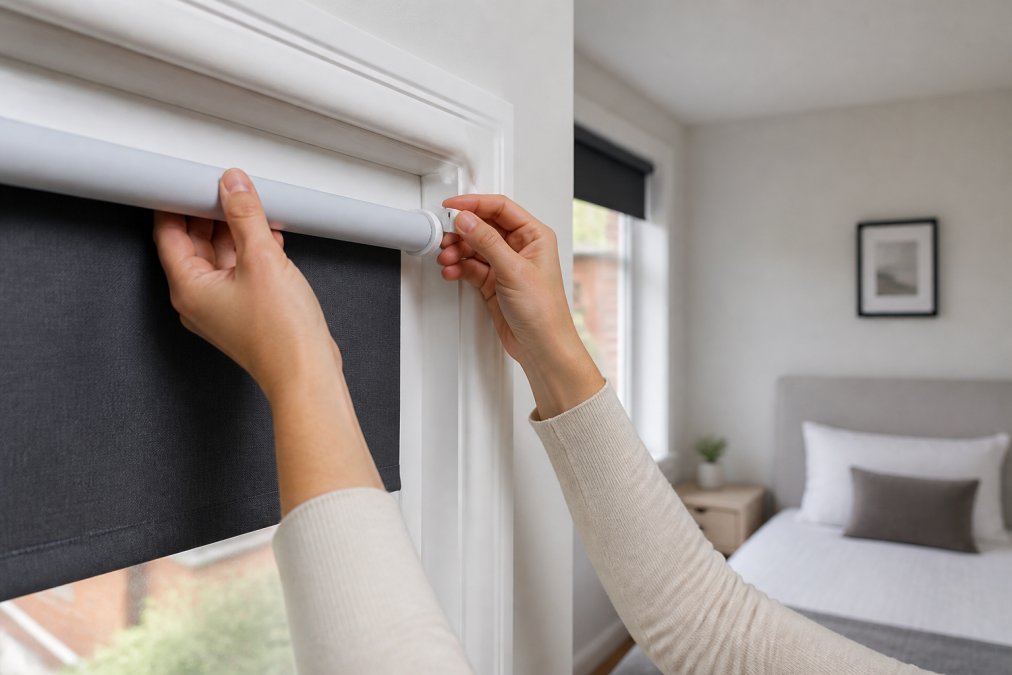
Fitting no-drill blinds takes most people under fifteen minutes per window. The exact steps vary slightly by system, but the order stays the same. Here's the process for a tension-fit blackout blind.
What You'll Need
- Your made-to-measure blind
- A step stool or small ladder
- A tape measure for a final check
- A clean cloth to wipe the frame
- No drill, no screws, no wall plugs
Installation Steps
- Wipe the window frame and recess clean and let it dry.
- Check the blind width against the recess one last time.
- Extend the tension ends or fit the bead clips, depending on your system.
- Slot the top of the blind into position first.
- Press the base into the recess until it sits firm.
- Test the friction fitting by gently pulling, it should not shift.
- Roll the blind up and down to confirm smooth movement.
- Adjust the side channels so no light escapes at the edges.
Expected result: A secure, level blind that stays put when you open and close it, with no fixings in the frame.
How to Remove No-Drill Blinds Without Damage
Removal is the part renters care about most, and it is genuinely simple, but doing it well is what protects your deposit. The goal is not just to get the blind off, but to leave the frame in the condition it was in when you moved in, so there is nothing for a landlord or letting agent to flag at checkout.
Before you start
- Take a photo of the frame with the blind still fitted, and another once it is removed. This is your evidence if any dispute arises later.
- Have a clean, dry microfibre cloth to hand.
- Clear the area below the window so nothing is knocked over when the blind comes free.
Step-by-step removal
- Open the blind fully so the fabric is rolled or stacked at the top and out of the way.
- Support the blind with one hand while you release the fixing with the other. Tension-fit blinds compress at the ends; grip-fit clamps unclip; bead-fit blinds lift out of the bead channel.
- Release one side first, then the other. Trying to pop both ends at once is how blinds drop and frames get scratched.
- Lift the blind away and set it down flat, not on its end, so the fabric does not crease.
- Wipe the frame with a dry cloth. If there is any residue from a grip pad, a barely damp cloth with a little washing-up liquid is usually enough. Avoid abrasive cleaners, which can dull uPVC.
- Inspect the frame in good light. Look for scuffs, sticky patches, or compressed foam marks.
If a mark does appear
Most no-drill systems leave nothing, but grip-fit pads can occasionally leave a faint residue on painted timber. A soft cloth and warm soapy water normally lifts it. On uPVC, a little white spirit on a cloth, used sparingly and wiped off afterwards, is a common approach, but test on a hidden area first. Do not use a scraper or abrasive pad, as these cause the very damage you are trying to avoid.
Storing for your next home
- Roll the blind loosely rather than folding it.
- Keep the brackets, clips, or tension ends in a labelled bag taped to the blind.
- Store flat or upright in a dry room, away from radiators and direct sun.
- Note the window size it fitted, so you know at a glance whether it will suit your next property.
- Compress or unclip the fixing, one side at a time
- Lift the blind free with both hands and set it down flat
- Wipe the frame and inspect in good light
- Store rolled, with fixings bagged and labelled
Which Window Types Work With No-Drill Blackout Blinds?
Most standard windows can take a no-drill blind, but the fixing you choose has to match the frame, not just the material. Two uPVC windows of the same width can need different systems depending on whether the glazing bead is removable and how deep the recess is. Work through the checks below before you order.
Check 1: Is there a removable glazing bead?
Look at the inside edge of the frame where the glass meets the plastic. If there is a narrow strip running around the glass that can be eased out with a thin blade, you have a removable bead and bead-fit is usually the cleanest option. If the frame is one continuous moulding with no separate strip, bead-fit will not seat and you need grip-fit or tension-fit instead.
Check 2: How deep is the recess?
Measure from the face of the frame to the wall or reveal. Tension-fit blinds need enough depth for the spring-loaded ends to sit inside the recess without the fabric fouling the handles or the sill. As a rule of thumb, a recess of around 40 mm or more gives tension-fit room to work; shallower recesses are better served by grip-fit, which clamps to the frame face rather than pressing into the opening.
Check 3: How wide is the frame face?
Grip-fit clamps need a flat, unobstructed lip to bite onto. Measure the flat width of the frame face at the top and sides. If the frame is rounded, chamfered, or narrower than the clamp jaws, grip-fit will not hold reliably and tension-fit is the safer choice.
Check 4: What is the frame made of?
- uPVC: tension-fit and bead-fit both work well. Avoid over-tightening tension ends on thin-walled profiles, as the frame can flex.
- Timber: grip-fit suits flat, painted frames. Older timber can be uneven or slightly bowed, so check for gaps between the clamp and the frame before committing.
- Aluminium: grip-fit or tension-fit, but slim aluminium profiles may not offer enough flat face for a clamp. Measure first.
- Roof windows: these need a dedicated drill-free roller system rather than a standard side-fixing blind. The Velux guidance on roof window codes explains how to find your window code, which you need before ordering. Just Blinds supplies blackout roller roof blinds that fit Velux windows and use a simple four-screw fitting, with an assisted cord tension system and 100% blackout fabric.
Compatibility checklist
Before you buy, confirm all of the following:

- Recess depth measured and noted
- Frame face width measured and noted
- Glazing bead present or absent
- Frame material identified
- Any handles, vents, or trickle vents that the blind would foul
- Window opening direction (top-hung, side-hung, tilt-and-turn) so the blind does not block operation
- uPVC: tension-fit or bead-fit, depending on bead and recess depth
- Timber: grip-fit on flat frames; check for bowing
- Aluminium: grip-fit or tension-fit, subject to frame face width
- Roof windows: dedicated drill-free roller blinds
Common Mistakes to Avoid
Most no-drill failures come down to three things: wrong system, wrong size, and a dirty frame. Match the fixing to your window type before you buy. Measure the smallest dimension, not the largest. Clean the frame so friction and clips grip properly.
- Buying before checking your window type
- Rounding measurements up instead of down
- Skipping the frame clean
- Over-tightening the tension ends
Frequently Asked Questions
Do no-drill blackout blinds really stay up?
Yes, when fitted correctly. Tension-fit and bead-fit systems use friction or existing window frame grooves to hold the blind secure. The key is accurate measuring and ensuring the brackets are fully clicked into place. Most no-drill blackout blinds stay up for years without slipping, provided the window frame is clean and the blind is the right size. Avoid over-extending tension rods, as this can weaken the grip over time.
Can you install blackout blinds on uPVC window frames without drilling?
Yes. uPVC frames are ideal for no-drill blinds because they usually have a smooth, consistent surface and a removable bead or glazing panel. Bead-fit blinds slot behind the existing bead without screws, while grip-fit options clamp onto the frame. Always check that your uPVC frame has a suitable recess or bead depth before ordering. If you are unsure, measure the frame and consult the blind supplier's compatibility guide.
How do you measure windows for no-drill blackout blinds?
Measure the width and drop of the window recess in three places (top, middle, bottom for width; left, centre, right for drop) and use the smallest measurement. For bead-fit blinds, measure the visible glass width and height instead. Always use a metal tape measure and record to the nearest millimetre. If you are measuring for made to measure blackout blinds, follow the supplier's specific guidance, as tolerances vary between tension-fit and bead-fit systems.
What are the disadvantages of no-drill blinds?
No-drill blinds may not suit every window type. Very large or heavy blackout blinds can be harder to support without screws, and tension-fit options need a consistent recess depth. Some frames with deep beading may not accept bead-fit brackets. Light leakage around the edges can also be slightly higher than with drilled-in blinds, though a recess-mounted blackout blind reduces this. Removal is straightforward, but re-installation requires the same care as the first fit.
Renting or renovating shouldn't mean settling for poor light control. Just Blinds makes made-to-measure blackout blinds that fit your windows exactly, with no drilling required. Choose from tension-fit, bead-fit and grip-fit systems, plus blackout roof blinds for Velux windows. Every order comes with free delivery on orders over £175.
Get started with Just Blinds and fit blackout blinds that block the light, protect your deposit, and move with you.
