
Table of Contents
- How to Measure for Blinds Inside Recess
- Tools Needed for Fitting Window Blinds
- Choosing the Right Mounting Method
- Step-by-Step Made-to-Measure Blinds Installation
- Child Safety Blind Cord Requirements
- Common Installation Mistakes to Avoid
- Troubleshooting Common Fitting Issues
- Conclusion
Last Updated: August 20, 2026
How to Measure for Blinds Inside Recess
Measuring for blinds inside a window recess is the foundation of a successful installation. Get this wrong, and you'll end up with gaps, misalignment, or blinds that simply won't fit.
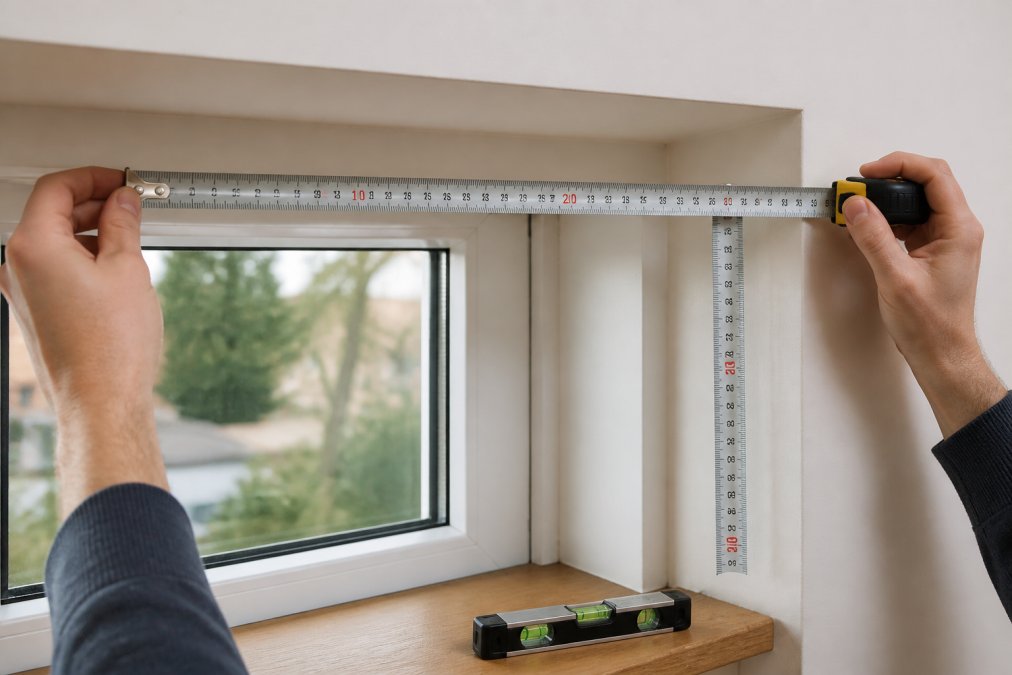
Taking exact measurements
Start with three critical measurements: width at the top, middle, and bottom of the recess. Window recesses are rarely perfectly rectangular. Use a metal measuring tape, not fabric, which stretches and introduces error. Record the smallest width you find, this is your blind width. If the difference between top and bottom exceeds 10mm, you're dealing with a tapered recess, which affects bracket placement.
For depth, measure from the front edge of the recess inward. You need at least 100mm of depth for most vertical blind headrails. If your recess is shallower, consider face fix or top fix mounting instead.

Measure height from the inside top of the recess down to the windowsill or floor. Measure in at least two places, left and right, because many recesses are slightly out of plumb.
Checking for obstructions
Before finalizing measurements, check for anything that will interfere with the blind once fitted: window handles, radiator pipes, electrical sockets, and curtain poles all matter.
If a window handle protrudes into the recess, you may need to fit the blind higher or adjust the mounting method. Radiators directly below a window can affect how the blind hangs; heat rises and can warp fabric if the blind sits too close. Run your hand along the recess walls and feel for bumps or uneven surfaces, which will prevent brackets from sitting flush.
Tools Needed for Fitting Window Blinds
A metal measuring tape (at least 5 metres long) is non-negotiable. A spirit level ensures your brackets are horizontal, which is critical for proper operation. A cordless drill with masonry and wood drill bits handles most surfaces. A screwdriver set, wall plugs, pencil, small hammer, and sandpaper complete the essentials. If your recess has uneven walls, a spacer or shim helps level the brackets.
Just Blinds supplies replacement brackets and headrails separately. Products like the Pack of 3 face fix brackets for vertical blinds (£5.99) or the Pack of 10 top fix brackets for vertical blinds (£6.50) let you replace worn components without replacing the entire blind.
Choosing the Right Mounting Method
Your window recess dimensions and blind type determine which mounting method works best.
Recess fitting versus face fix
Recess fitting places the blind entirely within the window recess, with brackets mounted on the inside walls. This looks clean and maximises light control because there are no gaps around the edges. It requires at least 100mm of depth and reasonably square walls. If your recess is shallow or walls are significantly out of plumb, the blind will bind or hang unevenly.
Face fix mounting places brackets on the wall surface outside the recess, so the blind sits in front of the window frame. This works in almost any situation: shallow recesses, bay windows, or out-of-plumb walls. Face fix blinds extend beyond the window frame, improving light control by reducing side gaps. The trade-off is appearance, brackets are visible and the blind protrudes from the wall.
Measure your recess depth first. If it's under 100mm, face fix is your answer. If it's deeper and walls are reasonably square, recess fitting gives a cleaner result.
Top fix installation
Top fix mounting secures the blind to the ceiling or top of the window frame, suiting bay windows, angled ceilings, or situations where the window frame is the most stable surface. It requires a strong mounting surface, typically timber or reinforced plasterboard. If your ceiling is plasterboard over metal studs, locate the studs and drill into them, plasterboard alone won't support the blind's weight.
Side fix brackets
Side fix uses brackets mounted on the side walls of the recess, angled inward to hold the headrail at a slight angle. This method is less common but works well in narrow recesses or where the top of the recess is inaccessible. It requires precise bracket alignment.
Step-by-Step Made-to-Measure Blinds Installation
Once you've chosen your mounting method and gathered your tools, follow this logical sequence.
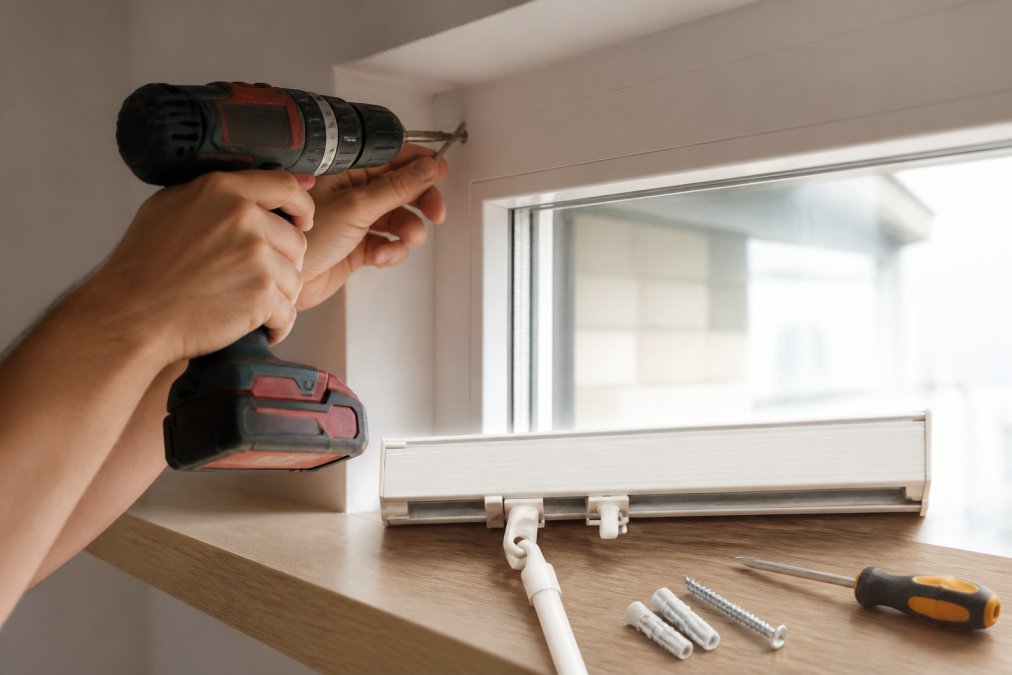
Preparing your mounting surface
Mark bracket positions with a pencil. For recess fitting, brackets typically sit 100-150mm from the top of the recess. Use your spirit level to mark a horizontal line across both walls.
If drilling into masonry, use a masonry drill bit with steady, even pressure. Once drilled, tap a wall plug into place with a small hammer. For timber frames, use a standard wood drill bit. Clean any dust or debris from the mounting surface, uneven surfaces prevent brackets from sitting flush. measuring windows for screens.
Fitting brackets and securing the headrail
Insert screws into wall plugs or timber, but don't tighten fully yet. Hang the headrail on the brackets and check that it's level. Adjust bracket positions if needed, then tighten all screws fully. Check again with the spirit level.
For vertical blinds, ensure the headrail is secure and doesn't move when you apply gentle downward pressure. If replacing an existing blind, products like the Replacement Vertical Blind Headrail with Wand Control (£21.84) or the Vertical Blind Headrail with Cord & Chain Control (£11.00) offer straightforward upgrades without requiring new brackets.


Hanging and adjusting blind tension
Slide the slats or fabric into the headrail according to the manufacturer's instructions. Once all slats are in place, operate the blind through a full cycle: open fully, close fully, and check that slats move smoothly without binding.
Adjust the tension device if your blind has one, usually a small dial or lever on the headrail. Proper tension keeps slats from swinging excessively. Check the blind drop, the distance from headrail to bottom bar, matches your original measurements.
Child Safety Blind Cord Requirements
Blind cords present a genuine hazard for young children. Current UK standards require that blind cords are not accessible to children under eight years old. Cords must be secured, shortened, or fitted with safety devices that prevent loops from forming.
The simplest approach is a cord safety cleat. Just Blinds supplies the Child safe blind device (£1.75), which works with most blind types and takes seconds to install.
If your blind has a continuous loop cord, shorten it so it cannot form a loop large enough to present a hazard, or fit a safety device that breaks the loop. Many new blinds come with breakaway cords that separate if excessive force is applied.
Position any cord cleat or safety device at least 1.6 metres above the floor. Check your blind regularly to ensure the safety device is secure and the cord is properly managed.
Common Installation Mistakes to Avoid
Measuring only once. Measure twice, record the measurements, then measure again. Window recesses are rarely perfectly rectangular.
Ignoring recess depth. Brackets designed for recess fitting need at least 100mm of depth. Check depth before ordering.
Skipping the level check. Installing brackets that aren't horizontal creates binding, uneven wear, and poor operation. Use a spirit level at every stage.
Drilling into plasterboard without locating studs. If fitting to a ceiling or external wall, find the studs and drill into them. Plasterboard alone won't support the blind's weight.
Overtightening screws. Tighten until snug, then stop. Plasterboard and some timber can crack if over-tightened.
Not checking for obstructions. Window handles, radiators, pipes, and electrical outlets interfere with blind operation if you haven't planned for them.
Adjusting tension incorrectly. Tension should be snug enough to prevent excessive swinging but loose enough to operate smoothly.
Troubleshooting Common Fitting Issues
The blind hangs unevenly. The headrail isn't level. Use a spirit level to check both the headrail and bracket alignment. Loosen the brackets, adjust, and retighten.
Slats bind or catch during operation. Check that the headrail is level and no slat is twisted or damaged. If the headrail is level, the blind may have been inserted incorrectly. Remove all slats and reinsert them one at a time.
The blind doesn't fit the window width. If made-to-measure blinds are too wide or narrow, the measurement was likely incorrect. Check your original measurements against the blind dimensions. Contact the supplier immediately if there's a discrepancy.
Brackets are loose or creaking. Tighten all screws. If screws won't tighten further, the wall anchor may have failed. Replace the wall plug and reinsert the screw.
The cord or wand is difficult to operate. Check that the blind is level first. If that's fine, reduce the tension slightly.
Light leaks around the edges. This is normal with face fix blinds. For better light control, consider upgrading to a recess-fit blind or adding a pelmet. For recess-fitted blinds, light leaks suggest a measurement error.
| Issue | Most Likely Cause | Solution |
|---|---|---|
| Uneven hang | Headrail not level | Use spirit level, adjust brackets |
| Binding slats | Twisted slat or out-of-level headrail | Check level, reinsert slats one by one |
| Loose brackets | Screws not fully tightened | Tighten all screws, replace wall plugs if needed |
| Difficult operation | Tension too high or headrail misaligned | Reduce tension, check level |
| Light leaks | Face fix blind or measurement error | Upgrade to recess fit or add pelmet |
| Cord won't move | Tension too high or mechanism jammed | Reduce tension, check for obstructions |
Installing made-to-measure blinds properly transforms how your windows function and look. The process demands precision in measurement, care in bracket alignment, and attention to safety, particularly if children are in the home. Just Blinds provides made-to-measure blinds built to fit your exact specifications, along with replacement components like brackets and headrails when you need spares. Measure carefully, fit methodically, and your blinds will operate smoothly for years.
Frequently Asked Questions
How do I accurately measure for made-to-measure blinds?
Measure the width at three points (top, middle, bottom) and the drop at three points (left, centre, right) using a metal measuring tape. Record the smallest width and largest drop to ensure your made-to-measure blinds fit without gaps. For recess fitting, measure the exact depth of your window recess. Always take measurements twice to confirm accuracy before ordering.
What tools are required to fit blinds at home?
You'll need a drill with appropriate drill bits, a spirit level, a metal measuring tape, a screwdriver, wall plugs (for masonry), and a pencil. For some installations, you may also need a masonry drill if mounting into brick or stone. A step ladder or stool helps with reaching upper brackets safely. Having all tools prepared before you start makes the fitting process smoother and reduces errors.
Are there specific child safety regulations for fitting blinds?
Yes. Blind cords must be secured using a child safety device or cleat to prevent strangulation hazards. The cord should be kept out of reach of children and taut when the blinds are in use. Just Blinds offers an affordable child safe blind device (£1.75) that clips onto existing cords. Always position the safety cleat at least 1.5 metres above floor level, away from furniture children can climb on.
Can I fit made-to-measure blinds without drilling into uPVC?
Yes. If you prefer not to drill into uPVC frames, use adhesive brackets or tension rods designed for uPVC windows. However, drilling into uPVC is safe if you use the correct technique: use a standard drill bit (not masonry), drill slowly, and avoid drilling near frame joints. For permanent, secure fitting, drilling is the most reliable option. Always check your blind's weight capacity before choosing adhesive-only mounting.
What should I do if my made-to-measure blinds don't fit properly after installation?
Check that your brackets are level using a spirit level and aligned correctly before the blinds are fully secured. If there are gaps, verify your original measurements were taken at three points across the width and drop. If the blind width is genuinely too large or small, contact Just Blinds about replacement options. Always measure twice before ordering to avoid fitting issues.
How much clearance is needed for inside-recess blind installation?
For inside-recess fitting, allow at least 25-30mm clearance from the window handle to prevent obstruction when operating the blind. Measure the depth of your recess to ensure the headrail and control mechanism fit without fouling the window frame. If your recess is shallow, face-fix mounting on the frame exterior may be a better option. Check for any internal obstacles like catches or hinges before ordering.
How do I know if my brackets are properly secured?
After tightening all screws, gently pull the bracket away from the wall with moderate force, it should not move or flex. Use a spirit level to confirm brackets are perfectly horizontal, especially if installing multiple brackets. For masonry, ensure wall plugs are fully inserted before screwing in. Test the headrail's stability by applying downward pressure along its length before hanging the blind slats.
This article was written using GrandRanker
